Well I suppose
that'd be true if these were the first
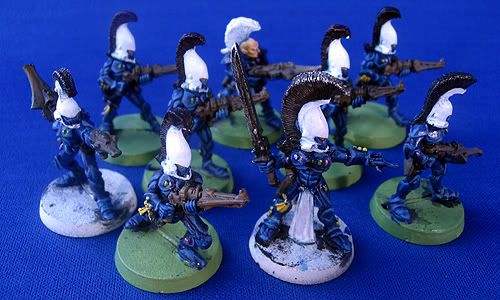
Eldar figures to be finished but there you go. My
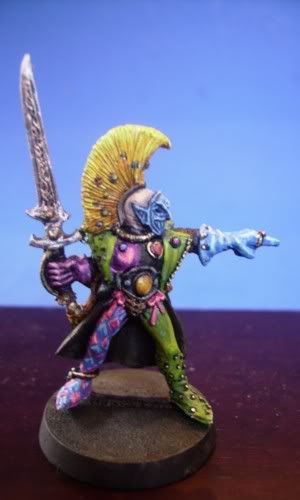
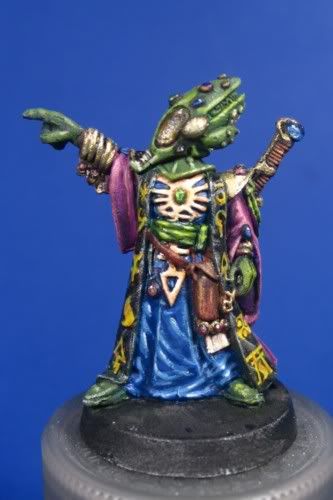
Eldar Rangers are finished and this time I did take some in-progress pics. I wanted to keep the main army colour scheme of green and purple but at the same time set these guys apart in keeping with their
independent lifestyle. To do this I toned down the colours and added more earth tones.

I started with a black primer and applied the base colours:
Dark Angel Green for the armor, leggings and gloves,
Liche Purple for the shoulder plates and helmets, a 50/50 mix of Graveyard Earth and
Liche Purple for the the long coats and Graveyard Earth for the weapons and leather accessories.
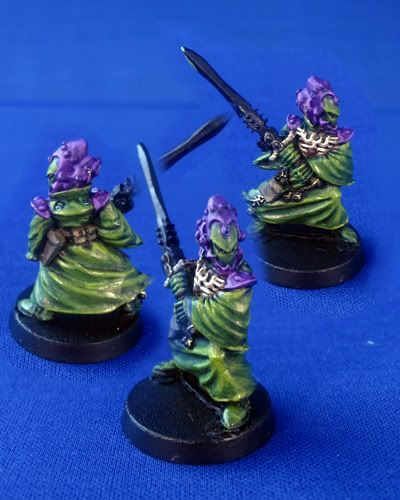
Faces where painted
Bronzed Flesh, followed by a wash of Dark Flesh then highlighted with Elf Flesh with higher highlights added by adding Skull White.


At this stage I wanted to make the leggings and gauntlets look like green leather to contrast with the green
Il-
Kaithe armor even though I used the same base colour.
ArmorBC - DA Green
H1 -DA Green + Goblin Green
H2 - Goblin Green
H3 -
Bilious Green
Leggings/GauntletsBC - DA Green
H1 - Imperial Strike Green
H2 - IS Green +
Kommando Khaki
H3 -
Kommando Khaki


At this stage I worked on the purples and leathers.
Long CoatBC - Graveyard Earth +
Liche Purple
H1 - BC +
Kommando Khaki
H2 - H1 + more
Kommando Khaki
Shoulder Plates/HelmetsBC -
Liche Purple
H1 - BC + Skull White
H2 - H1 + more Skull White
LeatherBC - Graveyard Earth
H1 - Snakebite Leather
H2 - Vomit Brown

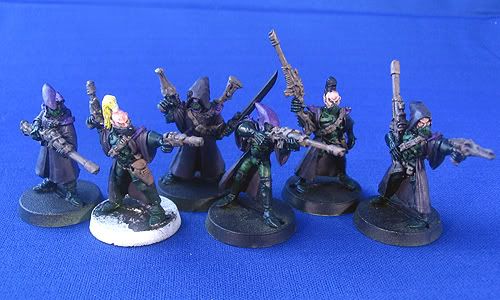
Finishing off with a funky
Eldarish camo pattern inspired by the
GW Biel-Tan Rangers. To start off I traced a
zig-
zag pattern using
Catachan Green. However, once this dried it was extremely difficult to see. I would skip this step next time. Over top of this line I put down a line of thinned
Camo Green. To finish off I added some highlights with a mix of
Camo Green and
Kommando Khaki.
Weapons
BC - Graveyard Earth
H1 - BC + Bleached Bone
H2 - Bleached Bone
To imply the Rangers being in a forest or some other cover I add bits of twigs, lichen and dried cedar needles along with the grass mix to the bases.
GB


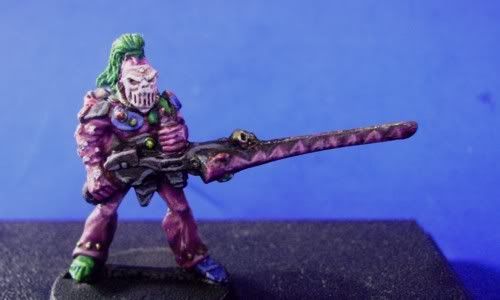
 For this particular figure I did even less surgery. I left the arms in thier original position and just removed the lasgun part. After cutting the lasgun away from the right hand, I added a shuriken pistol from the weapons frame and re-attached the right forearm at a slightly different angle. For the left side, I cut a fist from one of the arms from the Eldar arm frame and attached a sword from the weapons frame, cut the little nub off the arm and glued the fist in place. By adding different arm and weapons combinations and a head swap or two you end up with a diverse group.
  Literally! I remember seeing these 'death-world' cacti in a White Dwarf a long time ago and have been meaning to put some together myself. They are very easy to make and inexpensive to boot.
  Next use a toothpick to poke some guide holes into the balls. Break the ends off the tooth picks and insert into the guide holes. The length of the spike depends on the size of the ball for the half ball I used just the tip of the toothpick to represent an immature plant, while the spikes on the large ball stick out a lot farther representing a mature specimine. One note though, I really should have blunted the ends of the toothpicks by running them on some sandpaper but I was on a roll and didn't think of it.


 Using the template, I found the appropriate size and drew this on my plastic card sheet. The template is handy but you could also trace around the base to draw a circle. I then cut the circle out using a pair of scissors. I wasn't too concerned about cutting a perfect
  Using the scribing tool (the back of an old #11 blade work well too) I gauged various cracks and fissures across the surface until I was happy with the look. To give the base a more 3-D effect I removed one large and several smaller sections and repositioned them so that they overlapped at the edges. I made sure to add nicks and cracks to these smaller pieces as well. Once I was happy with the arrangement I glued the card to the base with model glue. I added some


