Showing posts with label WHFB. Show all posts

Thursday, November 24, 2011

That would be a Giant...

Ever since the plastic kit came out I've been wanting to get a giant for my Orc and Goblin army. A couple of months ago I finally picked one up. Since then I've been itching to get to work on it. To make him a bit different I gave him a bone pate protector made from the head of the dragon bone club from the kit. A little cutting and sanding was all that was needed.

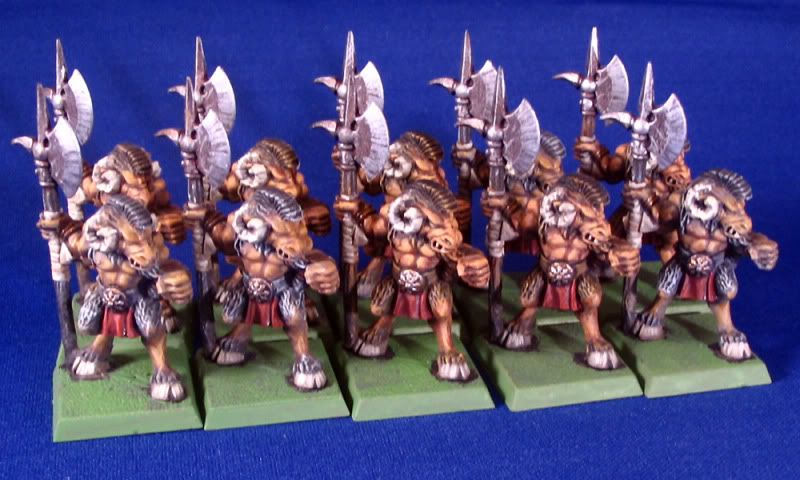
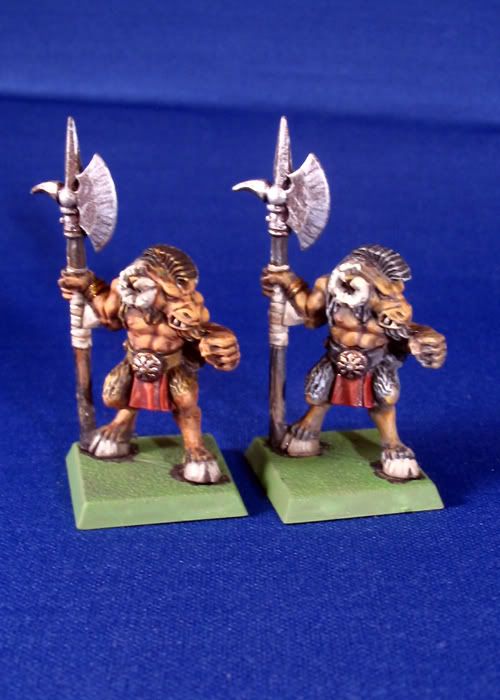
I wanted the giant to have a darker tanned skin tone so I started out with a basecoat of Beastial Brown. Working with a #4 round brush I layered thinned down Bronzed Flesh onto the raised areas and gently blended into the creases and crevices. Varying the amount of pigment/water I went over the model building up the highlights.


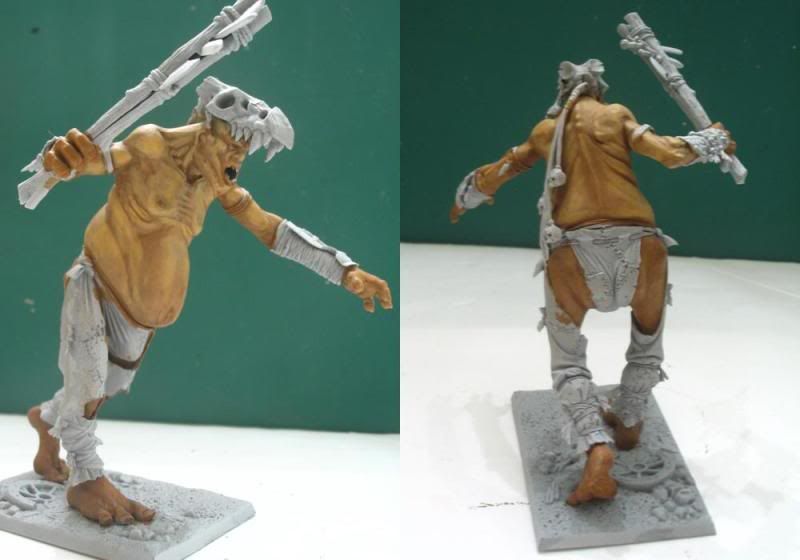
The next level highlights followed the same process but with Elf Flesh and a #2 round. This time I concentrated on bringing out detail and form.


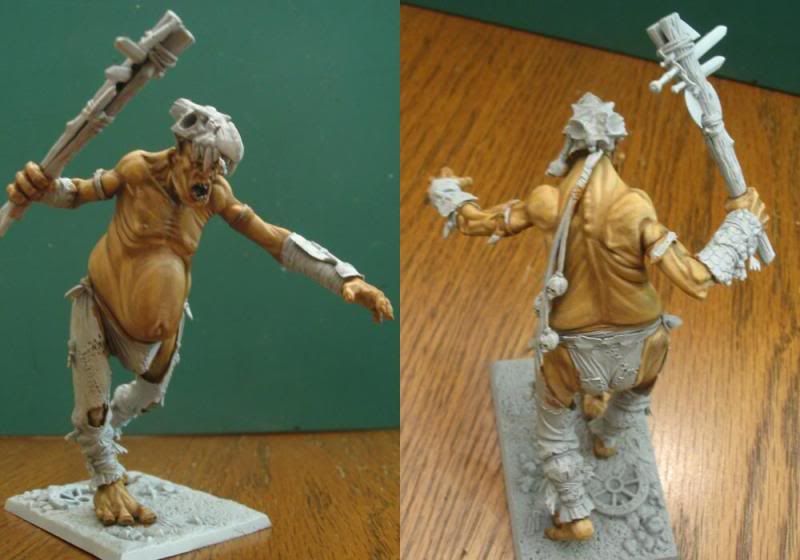
Skull White was added to Elf Flesh for the highest highlights. This was applied sparingly to the highest highlights. To this point I had been treating the face the same as the rest of the model but now using finer brushes I added more levels of highlight and took more time blending.


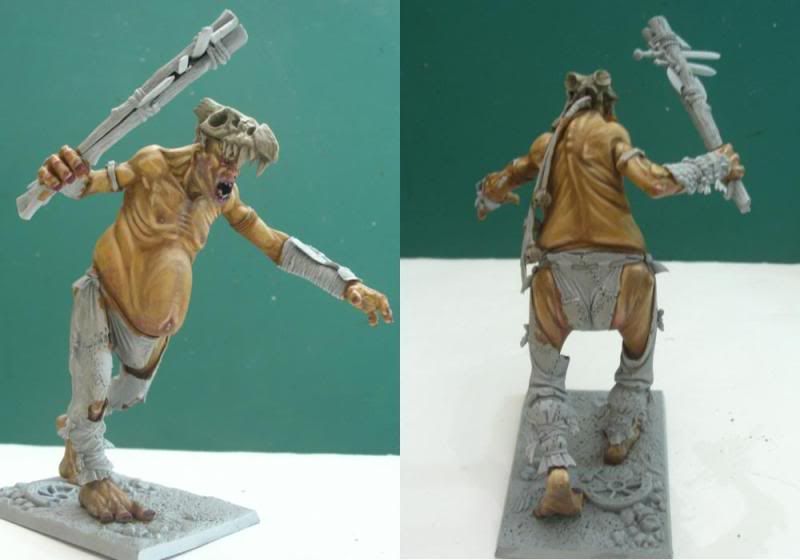
To add some life I blended thinned Liche Purple around the cheeks, nose and eyes. Liche Purple was also used for the lips which were then highlighted with Imperial Purple. Liche Purple was blended into the shadows around the figure and on areas such as elbows and knuckles. I aslo stippled some thinned Liche Purple around the waist, buttocks and thighs to simulate stetch marks and chaffing.


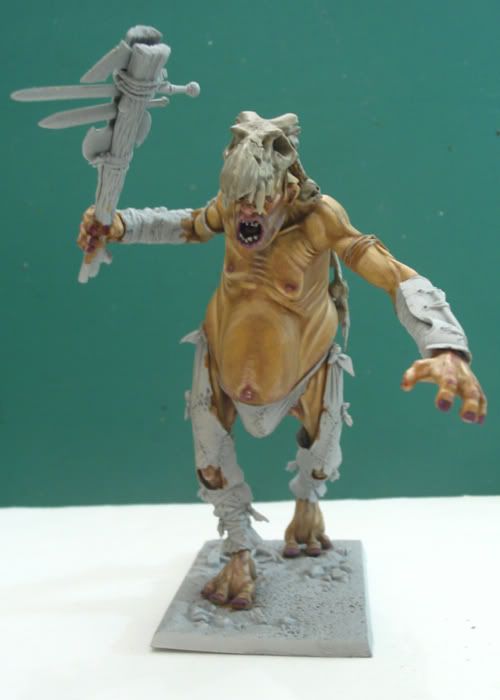
A 5 o'clock shadow was added using a thin wash with a 2:1 mix of Blue Grey and Elf Flesh. The teeth were basecoated Scorched Brown, picked out with Deneb Stone and highlighted with a 1:1 mix of Deneb Stone and Skull White.

GB

Thursday, November 3, 2011

The Beastmen Cometh

The primal call of beast has taken hold lately and I've been growing a fledgling herd. I've had these kicking around for sometime. They are the same vintage as the Black Orcs posted earlier. The figures are actually pretty good for some of GW's earliest delving into plastic. Sure they are not multipose but the castings are pretty good with well defined detail and they paint up pretty well.

I tried two different tones using more brown with black fur on the right to try to get variation in thge unit. I need to texture the bases yet. I am thinking forest floor and just need to gather the materials. Another note about the bases. I originally painted them Khemri Brown as a change from the Goblin Green I usually use but it did not look right to me so I revert to my trusty GG. Below is a shot of the intended unit minus the standard bearer who is still in its package. Yes those are the cheesy beastmen from the Milton Bradly/GW game Battle Masters filling in the ranks. Not great but they'll do.

I also had a few old school Minotaurs in my way back machine and using eBay I've recently added a Doom Bull, Minotaur standard bearer and Karak One-Eye which will be coming soon to a blog post near you.

Friday, October 14, 2011

Chariots ho!


I picked up a few orc chariots on eBay recently. This one had a basic paint job so I re-painted it to go with my Orc and Goblin's army colour theme (red, yellow and blue). I have a few proper chariot bases on the way that I'll be using.


Tuesday, October 4, 2011

More Night Goblins

Long time no post or paint for that matter. I still manage to collect more stuff though. Being bound and determined to get back into things, I recently completed a unit of Night Goblin spear. The movement tray is homemade from a sheet of Evergreen styreen and half-round rod textured and painted in the same way as the bases as described in this earlier post .


Friday, July 16, 2010

Think Pink

As I continue to work on my chapel I have discovered the joys of pink foam insulation. This stuff, which you can find at any DIY hardware store, is an indispensable scenery material. You can make pretty well anything with it. In my last post I showed how I used it to make the chimney and supports. This past week I tackled the stone work around the base of the structure.
My first thought was to cut out individual bricks and attach them. I used this method on the back wall but I was not satisfied with the results. Cutting out the "bricks" was also tedious and messy. The I hit upon the idea of making panels of styrofoam, attaching them the the walls and textured with an xacto knife. I cut a piece of styrofoam about 100mm x 30 mm then carefully sliced off a 3-5 mm section. I continued making panels until I had what I needed to go around the chapel. The panels were glued to the lower part of the wall, clamped and left to dry overnight.

When the glue was set I took my xacto and carved the stones. An old paint brush was used to clean up any loose bits of foam that stuck into the crevasses. For the door I fashioned an arch with left over bits of foam. The door was scored and the wood effect will be brought out in the painting phase. Some tiny nails and craft sticks were added for details.
GB

Thursday, July 8, 2010

Foamcore is Your Friend

One of the things that attracts me about WH40K and WHFB are those wonderful pictures of beautifully painted miniatures against backdrops of marvellous terrain features. So I thought I'd try something different and build some terrain of my own. My first attempt was a small house. I borrowed heavily from the techniques presented in this article by Gary James http://www.terragenesis.co.uk/infopages/page191.html. Instead of doubling the wall thickness, I only used a single thinkness of foamcore and drew the windows on. Likewise the stone chimney is painted with a "stone" cap made from pink foam insultation topped off with drinking straws. Since I was making a single story building and didn't need to remove the roof, the gabels and end walls were cut as one piece. The house diminsions are 110mm x 145mm x 145mm. The wall height is 45mm to the eaves. This encouraged me to tackle something a bit more elaborate. Taking inspiration from the GW chapel model I've started to build my own chapel. The dimensions of this project are 110mm x 160mm x 200mm with the same roof slope as the house. For the second story I added another layer of foamcare measuring 35mm high at the sides and 110mm at the gables. I've cut niches in each gable that I plan the decorate with either statues or stained glass. Pink foam insulation is also used on this project for the the stonework supports, the chimney and various other bits of stonework. As you can see on one wall here I am experimenting with a technique the create the look of stonework foundations. I'm not sure how I feel about the results so far. The chimney came out pretty well I think. I've topped it off with a bit of bendy straw and a push pin (I only had clear ones on hand).
GB

Tuesday, June 22, 2010

Basic Basing

Basing is an easy way to add interest to your army. It can help unify you units thematically or just add a needed splash of colour. Basing is also a good excuse to let your imagination run wild and set your minis apart from anyone else's. The web is full of beautifully painted minis on elaborately designed bases. This can be somewhat intimidating but one needs to bear in mind that that level of detail is usually reserved for showcase figures, champions or elite units. For typical gaming figures you don't have to go too nuts.

When I started out I used to just paint the bases Goblin Green and be done with it. Then I moved up to simply spreading some white glue on the base and sprinkling it with green flock. Honestly - not a bad solution. What I've been doing lately is adding some interest to my base texture. I collected a variety of materials - decorative sWHFB, and and small pebbles from the craft section of the dollar store, fine sand and pebbles from the end of my driveway and other bits of debris like bits of drywall. The process then is pretty straight forward:


  1. Coat the base with glue. I use slightly watered down Elmer's Wood Glue because it has a stronger bond but regular white glue will do too.

  2. Sprinkle with mix of materials. I start with the larger bits and then sprinkle fine sand on top to fill in any gaps.

  3. Tap off any loose material

  4. Wipe the edges of the base with your finger if any of the glue went over the sides.

  5. Repeat.
You can base an entire unit in no time.

The whole unit is then primed and painted - leaving the bases for last. The bases are given a coat of Scorched Earth, followed with a dry brush of Graveyard Earth and a final highlight of Deneb Stone. Once the highlighting is done, add some random splotches of white glue, dip the base in some Citadel Static Grass and tap of the excess.

As a final touch I paint the edges Jungle Green. This is personal preference, others like leaving the base black or go with other shades of green or brown. Now here's the completed unit:


GB

Saturday, May 15, 2010

Black Orcs pt2


The black orcs are 99% done. I just need to do some touch-ups and finish the bases. I am probably going to change the banner at some point to,

The red armor was given a base for Mechrite Red followed by a wash of Devlan Mud with a touch of blue ink. The wash targeted the recesses and details. This was followed by highlights of Blazing Orange and Vomit Brown. To make the armor look worn I added random scratches and dings with Vomit Brown. In a similar random fashion I went over those marks with Scorched Brown with a final highlight of Chainmail.

The metal bits where painted Boltgun Metal and given 2 liberal washes of Badab Black and 1 wash of Devlan Mud before highlighting with Chainmail and Mithril Silver.
I mentioned in my last post that I had originally painted some of these figures up to be "table ready." Here is an example of the new and old versions side by side.
Ref: WD364 pp 96-100

GB

Tuesday, April 27, 2010

'Ere We Go, 'Ere We Go, 'Ere We Go...


I've been getting back into WHFB lately. Fantasy Battle was my first love. I remember picking up the boxed set of Harboth's Orc Archers - the start of my Waagh! I've tried pretty well every Fantasy army but I always come back to my Orc horde. They are just so much fun - even in defeat!


At any rate I've been re-doing and actually finishing some of my old miniatures. These Black Orcs are part of a unit I was working on before I stopped playing years back. I'm using some techniques picked up from some recent White Dwarfs. The pics are not the greatest but you get the gist.


I prefer to use a black primer now-a-days but the plastic orcs were already primed white from back in the day. I started the skin with a base coat of Orkhide Green, followed by a highlight of Goblin Green/Jungle Green. Additional highlights were added by mixing Bilious Green into the mix. I then used a liberal wash of Ogryn Flesh followed by a wash of Badab Black in the recesses. A final highlight of Goblin/Jungle/Bilious Green + Skull White was then added. The red armor is base coated with Mechrite Red.


The Boss and Standard are metal figures and were already painter 'table ready'. I'm just updating the color scheme a bit and cleaning up some details. If I remember correctly I started these guys off with Salamaner Black - a colour which used to be in the Citadel range. This was a green-black colour which I would have highlighted with Dark Angels Green and Skull White.


- updated with better but still not great pics 4/28/10
GB